- Home
- 9.1 Symphony Training Material
- 9.0 Cataloging Tools
- Department Manual
- Bound-with Function
Bound-with Function
The “Bound-With” function is used to link two or more bibliographic records representing items in one physical unit and thus containing only a single barcode. In this way all the records are linked to that barcode, allowing all the connected items to show that they are checked out, transferred to reserve, etc. The record containing the barcode is the “parent” item (normally this should be the first item in the group); other items bound-with the parent are referred to as “child” records.
This function may be used for items traditionally thought of as “bound-with”, but can also be used, for example, to connect analytics with their parent item.
Before using the bound-with function, the cataloger must consider: should the item be cataloged with a single or multiple records? In some situations (such as bound pamphlets going to the stacks), a collection level record might be sufficient rather than separate records linked using the Bound-With function.
Keep in mind when deciding whether to use multiple or single records:
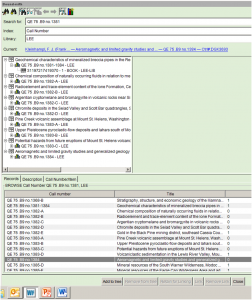
- In the call number browse, if the bound-with function has been used, only the parent record/call number is displayed. The parent call number should match the spine label that will be affixed to the physical item. It may offer a clue that
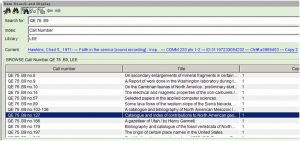 multiple items are bound together, as in this instance where numbers 102-106 of a series have been bound into a single volume. But, if multiple unrelated items are bound together, the call number may only be associated with the first title within the physical volume as in the next example. Look for the “Bound-with Information” tab as a clue that there are multiple bibliographic records linked to a single barcode.
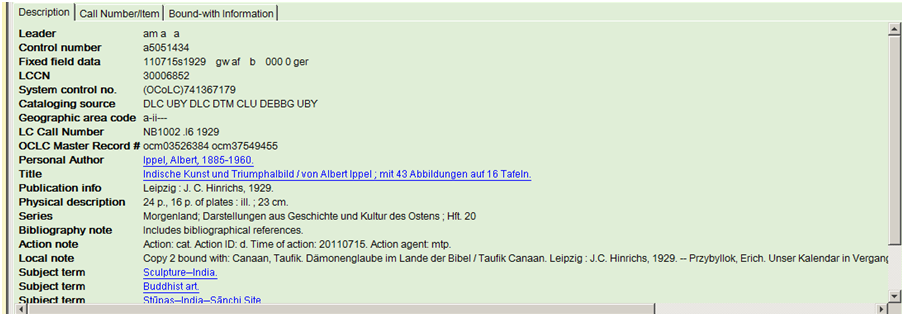
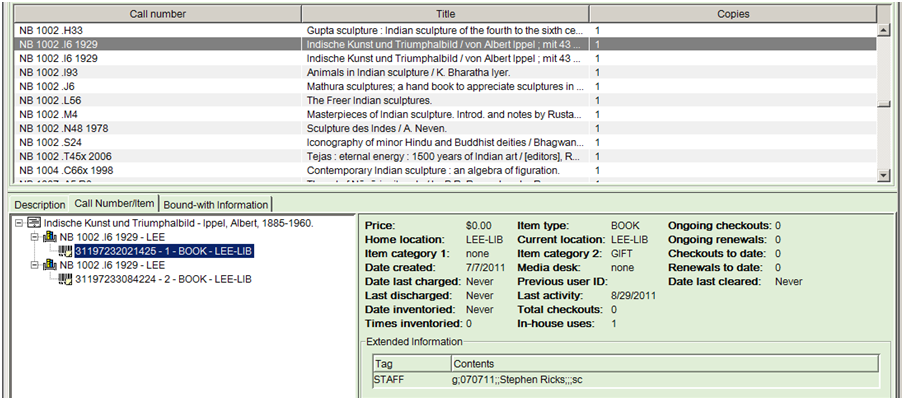
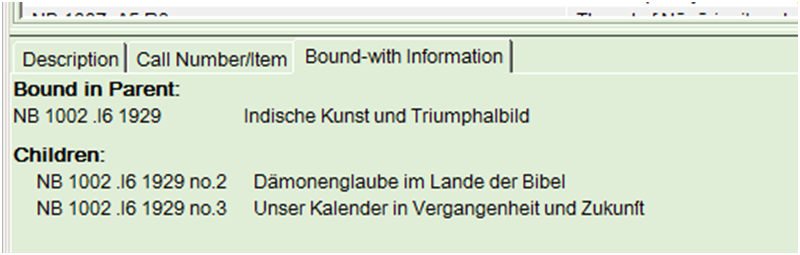
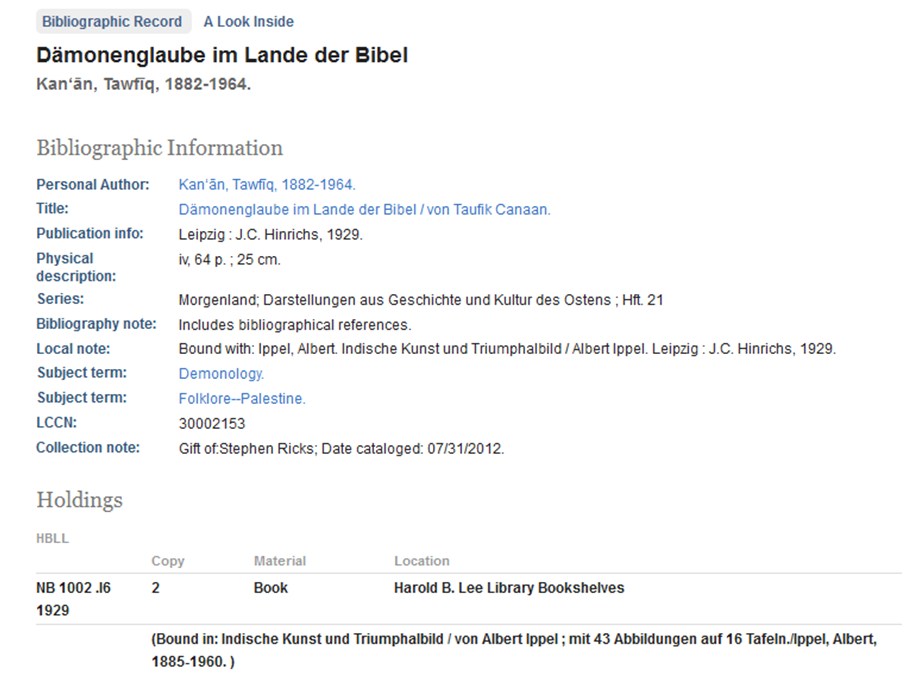
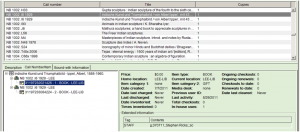 In this particular instance, there are two copies of this particular title. One copy is a stand-alone and the second copy has been bound with two other titles. Clicking on the Bound-with Information tab offers greater detail about the physical volume’s contents.
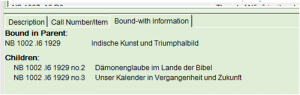 As of August, 2012, Primo does not have functionality to deal with bound-withs. Patrons must search in “Library Catalog” which searches only the Symphony database if they wish to see bibliographic information about the child records. In the Symphony public catalog, child records present the call number belonging to the parent with a note that the title is “Bound in:” followed by the data which appears in the 245 field of the parent.
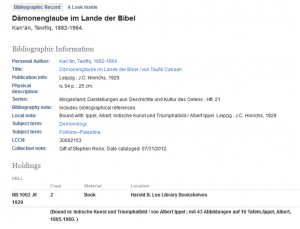
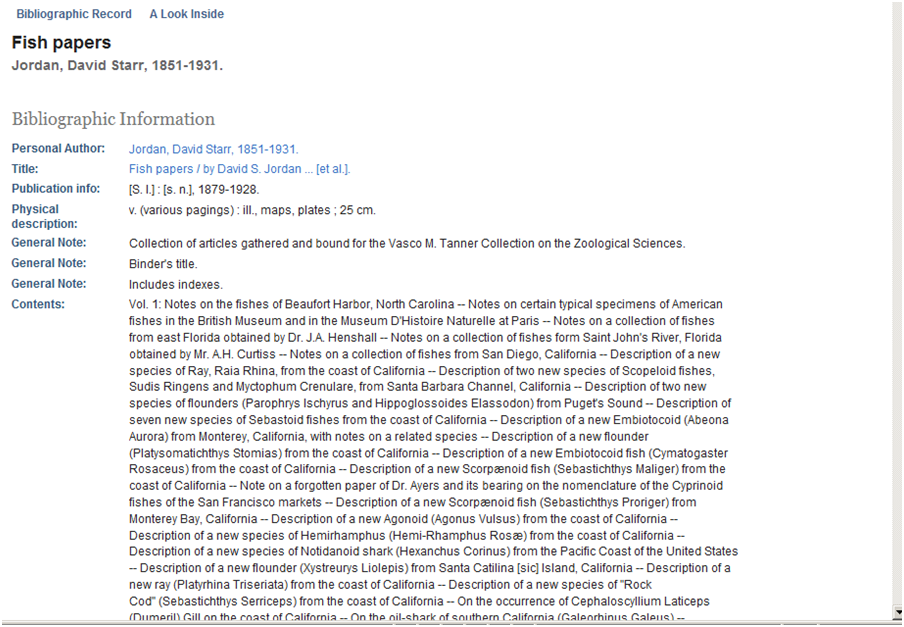
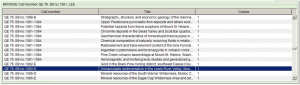
- In complex situations, the bound-with display might be confusing to patrons and a burden to the cataloger. In the following instance, a professor clipped journal articles and then had them commercially bound into a seven-volume set with the collective title “Fish papers.” Each volume had 40-60 individual articles about fish, no further subject analysis was needed. Rather than analyze each article, it was deemed preferable to create a single bibliographic record and to use the contents notes to cite the individual works.

Preliminary steps
- It can be helpful to insert flags at the title page for each child. (If there are tons of children, it can be helpful to number the slips)
- Search the database to determine whether the library owns other copies of the various items.
Catalog the “parent” title
Once the preliminary steps have been taken, catalog the first item in the bound volume as usual. (i.e., if there is no record of the “title” in the catalog, create a bibliographic record and catalog following the usual process. If there is a cataloged record that matches this exact item, treat it as an “add to shelf.” Make the appropriate modifications to the record, such as:
- Add the appropriate “bound with” note. In some situations, multiple notes may needed. Examples are:
- 246:1_: |iNo. 1 in volume with binder’s title:|aM.I.A. lessons, 1963
- 501:__: Bound with: Georgii Pisidae Expeditio Persica, Bellum Avaricum, Heraclias. Bonnae, 1836. Sancti Nicephori … Breviarium rerum post Mauricium gestarum. Bonnae, 1837. [NOTE: In most instances, the bound-with note for the parent includes a reference to every successive title contained in the bound volume.]
- 501:__: Issued with: A bookbinder’s analysis of the first edition of The Wonderful Wizard of Oz / by Michael O. Riley (47 pages ; 31 cm)
- 590:__: Stacks copy bound with: The Bowsham puzzle : a novel / by John Habberton. New York : Funk & Wagnalls, 1884.
- 590:__: Bound with series numbers 102-106. [NOTE: This usually applies to retrospective cataloging situations or where there are numerous “child” records.]
- The call number and copy must be unique. The barcode cannot be added as a copy 2 to an existing call number, even if there is more than one copy of the works bound exactly the same way. If the call number or call/copy combination is not unique, there will be problems down the road because the system assumes that the child records are linked to every copy associated with that call number. That makes it problematic should one wish to change the home location, withdraw a copy, etc.
This can be achieved a couple of ways:- By adding a new call number to the library as in the following example. In this case, copy 1 was bound as originally issued; copy two was bound with three titles published as part of the same series.
- DO THIS
- Varying the copy number in the added call number
is enough to make this call number unique.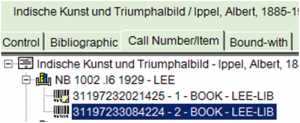
- NOT THIS
- By varying the call number:
- Copy 1 — QE 75 .P76x|zno. 1151-A (stand alone, barcode 311972245782590)
- Copy 2 – QE 75 .P76x|zno.1151-1155 (no. 1151-A is the “parent”, with which is bound series nos. 1151-B through 1151-G and 1152-1155, all sharing barcode 31197233084240)
- By adding a new call number to the library as in the following example. In this case, copy 1 was bound as originally issued; copy two was bound with three titles published as part of the same series.


Importing “child” records
Where necessary, use SmartPort to import a bibliographic record for each “child” into the database. Import the record for each child in the order in which they appear in the bound volume.
- Add the “bound-with” note(s) as needed. It is usually enough to just refer back to the first title or parent record, e.g.
- 501: : Bound with: Indische Kunst und Triumphalbild / Albert Ippel. Leipzig : J.C. Hinrichs, 1929.
- On the call number/item tab, the call number must be unique and have 0 (zero) copies attached to it. (This functionality is a matter of setting preferences correctly.)
- The base call number (the part that appears before subfield z) should match that of the parent. What is entered after the subfield z (|z) can be varied. The variation can be based on a part number or the order in which the child appears within the whole.
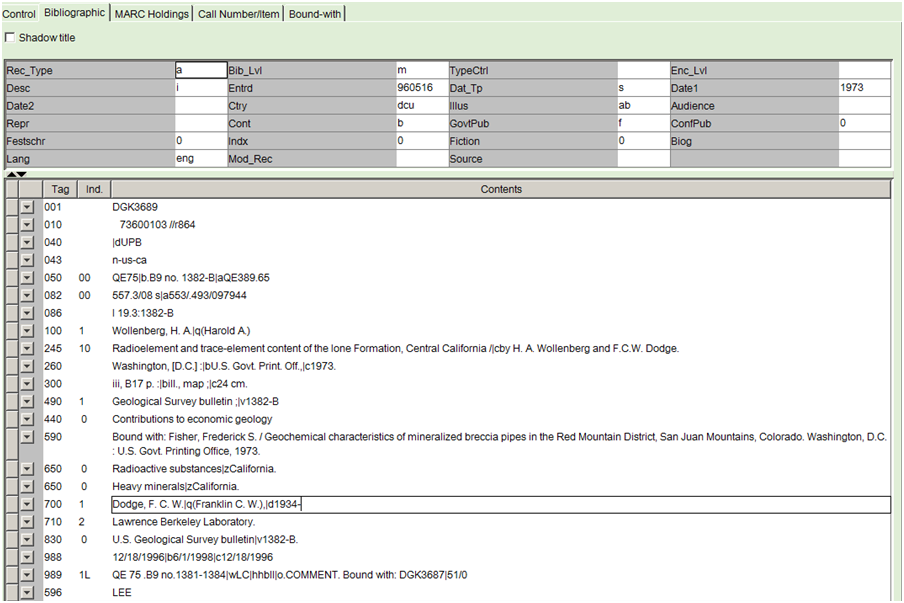
- QE 79 .B9|zno.1382 — the second item bound with series nos.1381-1384 (spine label for parent reads QE 79 .B9 no.1381-1384)
- NB 1002 .I6 1929|zno.2 – the second of three items bound together, where the parent’s call number/spine label reads NB 1002 .I6 1929
- If one has two copies, one of which stands alone and the second is bound together with other items, add a second call number for the child, remembering to make it slightly different from the stand-alone copy, e.g.:
- QE 79 .B9|zno.1382—a stand-alone copy to which a barcode is attached
- QE 79 .B9|zno.1382x—call number for linking to the parent’s barcode
- SirsiDynix training materials indicate that it is not necessary to enter a call number at all in child records, that it’s OK to use the system-generated XX call number, since only the parent call number displays to the public. This is not recommended because call numbers are used for a variety of reasons, particularly for identification in the linking process and in reports. It should also be noted that once child records are linked to the parent record, the order in which they display is not necessarily the same as the order in which items are bound or numbered (to be explained later). Determining that all children are linked to the parent can, therefore, be difficult to establish when relying upon XX call numbers, particularly when there are numerous children.
- The base call number (the part that appears before subfield z) should match that of the parent. What is entered after the subfield z (|z) can be varied. The variation can be based on a part number or the order in which the child appears within the whole.
Creating links between already existing catalog records
Multiple reasons exist for using the bound-with function at a point after which an item was treated as an independent, stand-alone item. Binding practices for monograph series or analyzed serials are one example. At some point after cataloging, these items are pulled from the stacks and bound together.
Pre-1998 cataloging systems used by the library did not offer bound-with functionality. As a result, child records are unlinked to the parent and have a call number with a copy attached to them. Such records may display either valid or dummy barcodes, depending upon when the record was created. Clues that legacy records represent items that are part of a bound-with volume may exist, although not all of the clues may appear in the same record. Such clues include:
- When browsing call numbers:
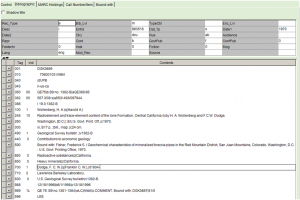
- In the bibliographic portion of the record:
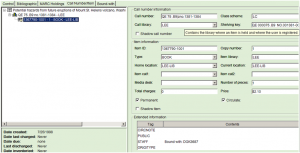
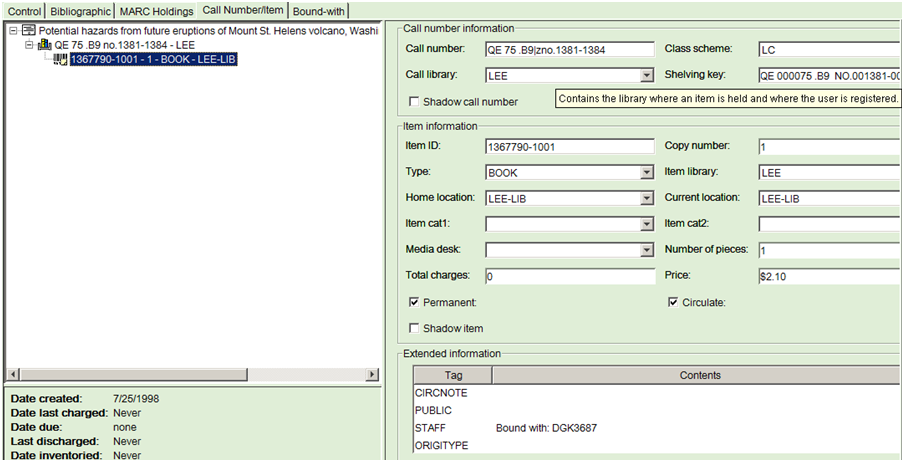
- In the call number/item portion of the record:
In order to create the link between existing records, the call number for “binding” must have zero copies.
- Click on the Call Numbers and Item Maintenance wizard.

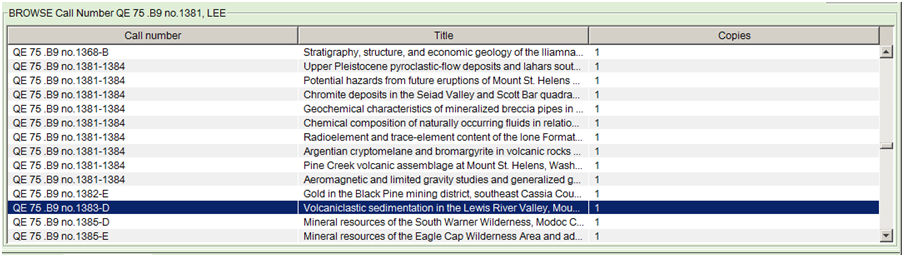
- Execute a Call Number Browse search for the parent record. e.g. QE 75 .B9 no.1381.] The child records should follow in call number order.
- Highlight the first child record. Click Modify button.
- Click on the Bibliographic tab to verify that the record matches the physical item.
- Click on the Call Number/Item tab.
- Click on the barcode to be removed (which should highlight it).
- Click the Delete button.
- The record and call number should remain unchanged, only the copy/barcode has disappeared.
At this point, there are two options for proceeding because the process requires the use of the Modify Title wizard![]() and the Call Number and Item Maintenance wizard.
and the Call Number and Item Maintenance wizard.![]() (One cannot make changes to bibliographic data when using the Call Number and Item Maintenance wizard. AND, one cannot add call numbers or delete copies and/or call numbers when using the Modify Title wizard.) In either instance, the linking of child records to the parent record is the last step in the process.
(One cannot make changes to bibliographic data when using the Call Number and Item Maintenance wizard. AND, one cannot add call numbers or delete copies and/or call numbers when using the Modify Title wizard.) In either instance, the linking of child records to the parent record is the last step in the process.
Option 1
With this option, one makes all of the changes to the first child record, except for the linking step, before moving on to deal with the next child record.
- Click
 .
. - Make changes to the bibliographic part of the record as needed, e.g. adding “with” notes, etc.
- Click Save button.
- Click Close. [This should bring one back to the Call Number and Item Maintenance.]
- Highlight the next child and repeat steps 1-12 until all changes to all child records have been made.
- When finished, go to Step 16 (“Linking child records to the parent record”)
Option 2
Steps 1 through 8 are the same as with Option 1. The difference is that with this option, one completes all of the changes to the call number/item screen for all of the child records and then makes the changes to the bibliographic screen for all of the children using Modify Title.
Linking child records to the parent record
At this point, one is ready to actually use the Bound-with wizard to link all of the child bibliographic records to the parent record and its barcode.
- Click on the Bound-with wizard.
 . [NOTE: Depending upon how one’s desktop is set up, one may first need to click on the Special Cataloging icon or box.]
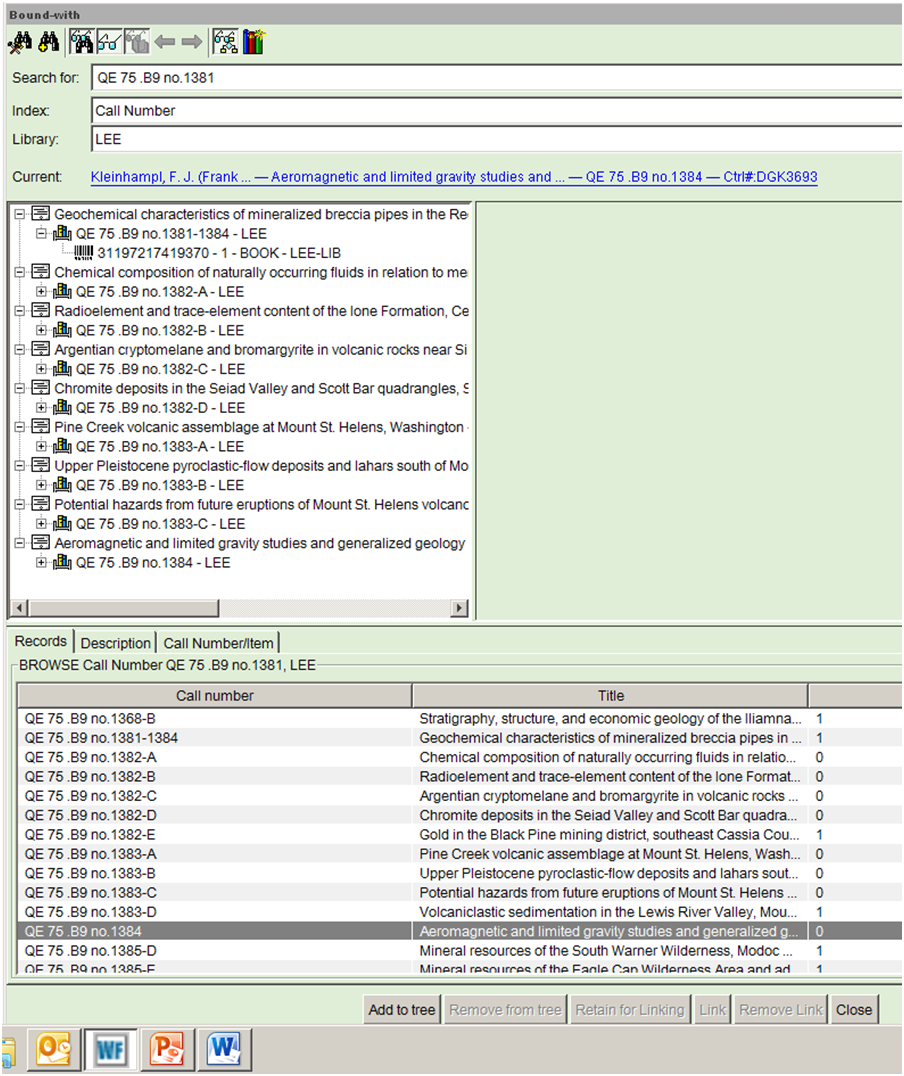
 - Execute a Call Number Browse search for the parent record, e.g. QE 75 .B9 no.1381. The records should appear in ascending call number order with the parent record appearing first in the hit list.
- Highlight the parent record. Click “Add to tree” button. As the Bound-with tree is constructed, the record will appear in the Hit List pane, i.e. the box in the middle portion of the screen.
- Highlight the first child record. Click “Add to tree” button. Repeat for each child.
- If a wrong record accidentally appears in the tree, highlight either the call number or barcode in the tree. Click on Remove from tree button and it will disappear from the tree.
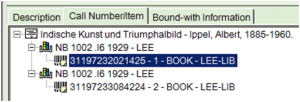
- When finished, the screen should look like:
- The parent record with its barcode should display at the top of the tree. The child records should display in the order in which they are bound.
- Click on the call number for the first child in the tree. Click Retain for Linking button. One has successfully accomplished this if the call number now appears in bold type. [NOTE: If there are multiple call numbers, select the one which has zero copies, assuming that there is only one such call number. If an item has been bound into several different bound volumes, select the call number to be bound with the corresponding parent.]
- Click on the call number for the second child in the tree. Click Retain for Linking button. Repeat until all call numbers for the child records are displayed in bold.
- Click on the barcode in the parent record to which the child records are to be linked.
- Click Link button.
- The Bound With Operation Results box will appear. The status and description columns indicate whether the attempt to link each child has been successful. The second column should list the children in binding/call number order. Verify that all of the children appear in the list. Click OK.

- The Linking tree now displays the child records as linked to the parent and the Bound-with Information tab appears on each linked record. Please note that the order in which the child records display is no longer in consecutive order by call number, but is based upon when the record was created, i.e., roughly title control number order.
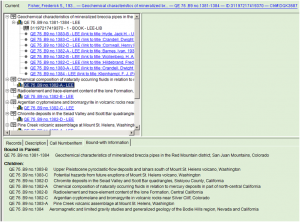


Children records now display in title control number order.
Editing a child record
Once the child call number has been linked to a parent record through the bound-with function, access to the child can only be achieved by means of a title (or author/title) search. Call number and barcode searches always retrieve the parent record which offers no means of access to child records.
If adding a second, i.e., stand-alone, copy, remember to click the Add Call Number button and vary the call number slightly. [Recommendation: add an “x” at the end of the call number associated with the bound-with copy, so that the spine label on the stand-alone copy can match the item in hand exactly.]
Overlay: SmartPorting over a child record
As a general rule, it is preferable to overlay a child record prior to linking it to the parent. It is possible, however, to overlay a child record after the linking has occurred.
- Access the child record by means of a title or author/title search. Do not try to access the record by executing a call number or barcode search (which will direct one to the parent record).
- Make a minor change to the record, such as deleting a less important field. Click Save. [This guarantees that one will overlay the child record, not the parent.]
- Using SmartPort, import the record one wishes to use, using the Replace Current Record option and proceed as usual. Be cautious when the overlay box pops up; verify that the child record is the one to be overlaid, not the parent. Once verified, click Replace (or Cancel if the wrong record is referenced in the box).
- Some local fields, such as the 583 and 955 fields, will be retained, but others may be lost when the record is overlaid. Replace or add the appropriate bound-with notes and complete other editing as needed before clicking Save.
Breaking a bound-with link
There may be situations where a bound-with link needs to be broken. For example, the bound volume may be taken apart, so that each piece can be treated individually. Each title within the volume may then be assigned a call number unrelated to the other items with which it was formerly bound.
- Click on the Bound-with wizard.
- Search for the bound volume using the Item ID search.
- Highlight the parent record. Click Add to tree button.
- Click the plus (+) sign in front of the title.
- Click the plus (+) sign in front of the call number.
- Highlight the child to be unlinked from the parent.
- Click Remove Link button. [This will just break the link between the parent and child, it will not affect the child record itself.]
- Click close to exit the Bound-with wizard.
- At this point, one can make the desired changes to the child record using the Modify Title and Call Number and Item Maintenance wizards as required.
Withdrawing a bound-with item
When a bound-with volume is withdrawn, all of the child records must be removed before the parent record can be removed. This is explained in detail in the section 3.5.3 Withdrawal of Library Resources.
Maintained by: Thom Edlund, Sharolynn Pyeatt, and Ruth Ann Hay
Last Updated: August 2014